Digital Media, New Tools and Technology (LDT300x)
Welcome to the course page! Explore the weekly sections for things I am learning along the way. Feel free to reach out if you have any questions or comments, always happy to connect!
WEEK 1
Digital Media Checklist
Creating and applying a digital media checklist helped me think critically about how to evaluate resources for my pottery minicourse, not just in terms of usability, but also accessibility, adaptability, and alignment with learning goals. I went beyond the standard criteria and included considerations relevant to my audience, such as beginner-friendliness, interactivity, and cultural inclusion.
Using the checklist to evaluate the OER “Technique to Style: Introduction to Studio Ceramics” confirmed its value as a supplementary resource. While I don’t plan to use the full content, the structure, clarity, and coverage of tools and techniques align well with my modules. The resource is legally reusable under a Creative Commons license, and although it isn’t fully accessible yet, it’s easily adaptable for inclusive use.
This process made me more intentional about curating content that is both high-quality and legally sound, while also building my own PDFs, visuals, and videos. I will include this OER in the “Additional Resources” section of the course as a deeper dive for motivated learners.
More than anything, this checklist is now a reusable tool that supports a thoughtful, learner-centered approach to selecting digital media.
Please check my template check list here (PDF version here) and the analysis of the OER mentioned here (PDF version here).

WEEK 2
Digital Document
For this week’s activity, I created a digital how-to guide titled “Foundations of Handbuilding: Slab Technique – Making a Cylinder Cup”. It aligns with Learning Objective 2 from my Instructional Design Document: helping learners apply slab-building techniques to create pottery forms. The goal was to make a clear, beginner-friendly resource for home potters using simple tools.
I focused on visual design principles such as contrast, alignment, and proximity to enhance readability and flow. The document includes two Creative Commons–licensed images from a relevant OER, helping visualize the tossing technique and final form. I also used a color contrast checker to verify accessibility compliance and wrote alternative text descriptions to support screen reader users. The resource includes practical tips based on my own pottery experience to make the content more relatable and supportive too, especially for learners navigating these skills on their own.
As an accessibility feature, I created a companion audio description to ensure that learners with visual impairments can access the guide's content. I also developed a written transcript of the narration for those who prefer or require text-based alternatives.
The biggest takeaway this week was how visual and audio elements can work together to increase clarity and inclusivity, even in low-tech instructional settings. This exercise also helped me grow confidence in creating instructional materials grounded in real learner needs, and it helped me think more critically about accessibility and inclusive design (not just as compliance, but as a core element of user-centered instructional design). I now feel better equipped to create learning materials that are both visually engaging and accessible to diverse learners.
Find the PDF how-to guide here.
The completed checklist here.
The accompanying audio file below:
The transcript here.

WEEK 3
Digital Image
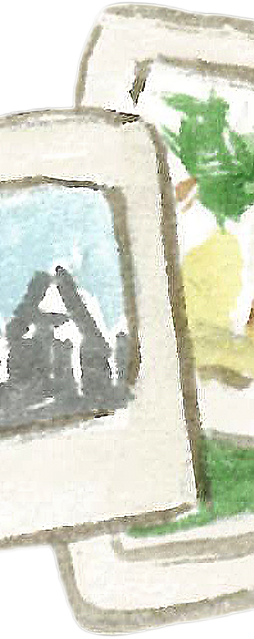
For Week 3, I created an introductory visual to serve as a welcoming image in my course’s landing module. The image aligns with the tone and structure of the course while reinforcing learner expectations. It also visually outlines the five core areas the course will cover: handbuilding, wheel throwing, glazing and decoration, firing, and video-based learning.
This visual supports learning by establishing a cognitive anchor at the start of the course. Each icon is intentionally designed to reflect a key topic, helping learners anticipate what they will engage with. From a motivational lens, the central message “Explore. Learn. Create” invites learners to connect their personal learning journey with the hands-on and creative spirit of pottery.
I applied visual design principles learned in Week 2 (such as alignment, contrast, and proximity) to structure the image clearly. Consistent earthy tones and a flat icon style create coherence across the visual elements and support quick visual recognition. Text is placed outside the images to enhance readability and support screen reader compatibility. Sufficient color contrast between background and text/icons was chosen.
The image was created with accessibility in mind. To meet accessibility standards, I ensured adequate color contrast and drafted alternative text to add within the LMS (Welcome image for a pottery minicourse. It includes the heading 'Welcome to Pottery' and subheading 'Explore. Learn. Create' with five icons representing handbuilding techniques, wheel throwing basics, glazing and decoration, firing process, and video tutorials. A drawing of hands shaping clay is on the right).
The image avoids conveying meaning solely through color and has no redundant embedded text.
Overall, this digital image serves both instructional and visual design goals: it welcomes learners, reinforces key concepts, and models best practices for accessible, inclusive learning materials.
Image title: "Welcome to Pottery: Your Journey from Clay to Creation"
The image meets the expectations for accessible and purposeful multimedia content, providing both aesthetic appeal and functional clarity. See below:
The checklist in PDF format here.
Logo:
In addition to the welcome image, I created a custom logo for my minicourse, combining a stylized pottery bowl icon with my brand name “Claysoul” and another tagline that is more open (not only for the course, but potential merch, products, other workshops, etc). The icon was designed to stand alone if needed, allowing for flexible use across learning materials (watermarks, video intros, or slide footers/tops). This logo supports visual consistency and brand identity throughout the course while remaining accessible and minimal. The color palette and contrast levels were chosen to meet accessibility standards.
The logo adds a professional and welcoming tone to the course experience.
Both the image and the logo are licensed under
.png)
.png)
WEEK 4
Digital Video
Video details:
-
Title: Getting Started with Pottery: Clay and Tools Essentials
-
Focus: Clay types + Basic tools
-
Type: A short explainer + visual overview (talking on screen, voiceover + visuals/pottery footage).
-
Tone: Friendly, beginner-supportive, lightly reflective (matching “learning alongside” style)
-
Guiding Question: “What do I need to know before I start playing with clay?”
-
Scope:
-
Types of clay (stoneware, earthenware, porcelain, etc.)
-
Basic tools (rib, sponge, pin tool, needle, wire cutter)
-
Reflection:
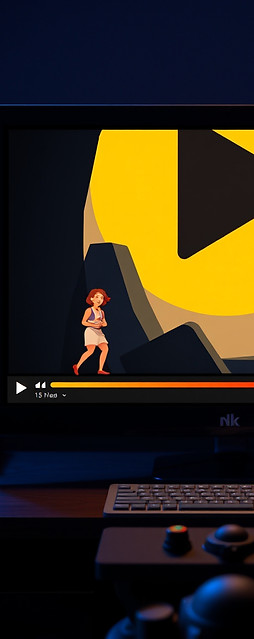
This video is designed to support beginners as they begin Module 1 of my pottery minicourse. It aligns with Course Learning Outcome 2 (CLO2) by helping learners understand essential materials and tools, and serves as an engaging bridge into hands-on practice. It specifically supports Learning Objectives 1, 2, and 3, by introducing types of clay and basic tools. The video helps reduce anxiety for new learners and sets realistic expectations before they begin working with clay.
Accessibility was a key consideration throughout development. I ensured high color contrast, slow pacing, and clear narration for cognitive clarity and inclusion. I used Synthesia to generate the video with and without closed captioning (along transcripts documents), and I carefully reviewed the final product for readability and timing. Visuals were designed to complement the script, reinforcing meaning and minimizing cognitive load.
I found Synthesia easy to use and effective for producing high-quality voiceovers and visuals. It offered a streamlined way to present clean avatars with consistent delivery. For future projects, I may explore tools like Loom or Camtasia to incorporate a more personal, voice-driven experience.
Finally, I used ChatGPT to help generate the custom pottery tool images included in the video, which added clarity and supported instructional value.
Youtube link: https://youtu.be/Nhca_y36pWk
Transcripts here:
No CC:
With CC:


WEEK 5
Animation Video
Video details:
-
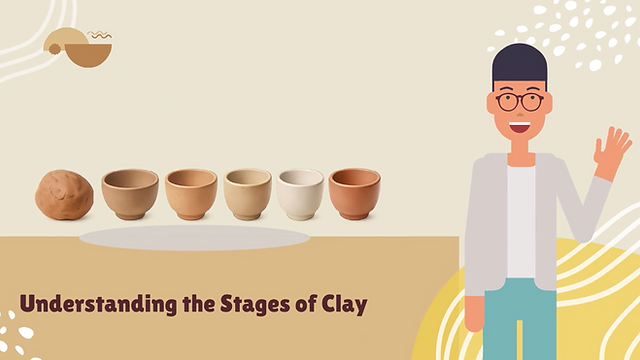
Title: Understanding the Stages of Clay
-
Focus: Six stages of clay + how to recognize them
-
Type: Animated explainer with voiceover and realistic illustrations
-
Tone: Supportive, sensory-rich, beginner-friendly, slightly humorous and conversational
-
Guiding Question: “How do I know what stage my clay is in—and why does it matter?”
-
Scope:
-
Identifying and understanding the main stages of clay (soft clay, leather hard, bone dry, bisqueware, glazeware)
-
Tips for recognizing each stage (touch, temperature, color)
-
Do’s and don’ts (e.g., when to trim, when not to attach handles)
-
Reflection:
This animation video supports learners early in my pottery minicourse by introducing the six key stages that clay undergoes: from soft clay to glazed ware. It directly aligns with CLO2 (understanding key processes in pottery-making) and LO4 (describing firing steps) while reinforcing foundational awareness before hands-on practice in LO1 and LO2. The video offers a sensory-based guide with visual cues that help demystify common clay behavior.
To ensure accessibility, I followed best practices like maintaining high visual contrast, using paced narration with clear enunciation, and adding closed captions through YouTube’s subtitle editor. These captions were reviewed for accuracy, timing, punctuation, and spelling. I also used icons and imagery to support auditory information, helping reduce cognitive load.
I created the animation using Vyond, which offered a powerful toolkit for combining storytelling with visuals. While the tool offers significant flexibility, I found the learning curve a bit steep (especially when customizing animations). However, I see great potential in the tool for future lessons. I also used ChatGPT to create realistic clay-stage illustrations and props that match the script. For future videos, I may explore more intuitive or affordable tools to balance time and cost.
This animation enhances the overall learning experience by allowing learners to visualize abstract transitions in clay and recognize key sensory clues. It’s not just informative, it’s reassuring.
Youtube link: https://youtu.be/S9swHOfcf3A
Transcripts here:
The video is published on YouTube (unlisted) under a Creative Commons Attribution-NonCommercial-ShareAlike (CC BY-NC-SA) license.
WEEK 6
Interactive Module Storyboard Draft
Storyboard:
Within the storyboard I mention an annex checklist. Find it here.
Reflection:
The lesson I sketched out, “Getting to Know Your Pottery Studio,” fits into Module 1: Introduction to Pottery of my minicourse. It introduces learners to essential studio elements, safety habits, and storage practices, aligning with the module’s learning objectives to promote readiness and safe engagement with clay.
Developing the storyboard helped me organize the learning sequence clearly and spot opportunities for interaction and learner reflection. I used Microsoft Word to create the storyboard. While not the most visual or collaborative tool, it allowed for detailed breakdowns of each scene (text, narration, visuals, interactivity, etc.) and helped me stay structured. To arrive at a format that worked, I reviewed examples from peers and refined the layout to include key fields like learning goals, activity prompts, and developer notes.
I see how a storyboard can be a powerful blueprint for aligning instructional content with objectives and preparing for development in authoring tools. It brings clarity and consistency to the design process and helps communicate vision to different collaborators. That said, it’s also time-consuming, and in fast-paced projects, teams may prefer simpler outlines, especially when working with SMEs or media designers who want just the essentials.
In the future, I’d like to explore more visual and collaborative tools like Miro, which would allow embedding sample images, uploading drafts (like the checklist I created), and easier commenting or linking across assets. These tools may also make it easier to engage teammates in reviewing storyboards interactively rather than through static documents.
Overall, I found the storyboarding process incredibly useful and plan to use it again to support future course development.
WEEK 7
Interactive Lesson
Interactive Lesson Title: Getting to Know Your Pottery Studio
License: CC BY-NC-SA
Links here:
-
Getting to Know Your Pottery Studio (https://potterystudiodarosan.netlify.app/#/)
-
Lesson PDF version here.
Reflection:
This week, I transformed the storyboard I created in Week 6 into a fully functional e-learning lesson titled “Getting to Know Your Pottery Studio” using Articulate Rise. The module aligns with the learning objective to help beginners understand how pottery studios work, the nature of clay, essential studio areas and equipment, and safety practices that promote a respectful, clean, and creative learning environment.
Learners interact with the module in multiple ways: through accordion reveals, a drag-and-drop and a flip cards activities as well as multiple choice questions and a reflection prompt. These interactions help deepen understanding of spatial organization, reinforce safe practices, and encourage personal accountability, without overwhelming beginners.
Rise was an intuitive tool for this build. I appreciated how seamlessly it allowed me to translate my storyboard into interactive sections while maintaining visual consistency and accessibility. The built-in blocks made it easy to insert knowledge checks, visuals, and interactive elements while ensuring the course remained accessible. I added human voiceover to one of the slides and included clear activity instructions, per assignment requirements.
However, I encountered a limitation with my free team trial, which did not allow public link sharing. To resolve this, I exported the course and successfully published it using Netlify: https://potterystudiodarosan.netlify.app. This workaround ensured my peers could access the lesson and confirmed that simple hosting tools can complement Rise’s clean design when sharing is restricted.
In future builds, I may explore Storyline, H5P, Genially or other tools to allow for more customization and logic-based branching. Still, Rise remains a powerful, user-friendly authoring tool, ideal for prototyping and delivering accessible microlearning content like this.